10 Best Booty Building Exercises
Anyone else lose their booty after having kids? The very little one I had quickly disappeared. One of my exercise goals has been to plump up my backside. Genetically speaking, I do not have the body type for a big booty. I have come to accept that. I would just like to feel comfortable in fitted pants again! (Let’s face it, it’s leggings. I want to feel good in leggings again!) I’ve been doing a certain set of booty plumping exercises for about a month now, and I can really see a difference!
Why did I choose these specific exercises?
These groups of exercises allow for movement in all directions of each glute muscle. Therefore, you achieve a complete and efficient workout that uses each muscle to its maximum potential. So, here’s a little anatomy for you...
There are 3 glute muscles. Each muscle has a slightly different function.
Gluteus Medius (A) — it's the primary mover for abduction of the hip. Abduction simplified, is moving away from the body. The anterior section of gluteus medius also assists with flexion and internal rotation while the posterior section assists with extension and external rotation. If you’ve ever done hip circles laying on your side in Pilates class, this is why they have you do circles going out and in, both holding the leg in front and behind the hip. This allows for activation of the entire muscle.
Gluteus Maximus (B) — its main function is to extend the hip, it does this in conjunction with a couple other muscles, it also externally rotates the hip (along with the iliopsoas, obturator, and piriformis muscles)
Gluteus Minimus (C) — it’s the smallest of the glute muscles and the deepest. It’s main function is to stabilize the hip. It abducts the hip and assists in internal rotation.
Favorite Glute Exercises
Here are some of my favorite glute exercises. For most of these, and if you can manage, I recommend sets of 10-15x for each exercise, plus performing them in succession for a nice burn.
Group 1
Donkey Kicks
1. Donkey Kicks
Starting on hands and knees while maintaining a flat back
Kick your foot upwards towards the ceiling.
The knee should stay bent at 90 degrees
2. Fire Hydrants
On hands and knees, keeping your knee bent at 90 degrees, lift your knee out to the side without rotating your back
Think about a dog and fire hydrant — this exercise is aptly named
3. Rainbows
Start on hands and knees with one leg fully extended behind you
Point your toes throughout the exercises, starting at one corner of your mat, drawing a rainbow with your toes. Your arc should not be bigger than your yoga mat
Lift and lower the leg from corner to corner
4. Straight Leg Extensions
Starting on hands and knees
Place one leg strength behind you
Slowly lift and lower the leg straight up and down
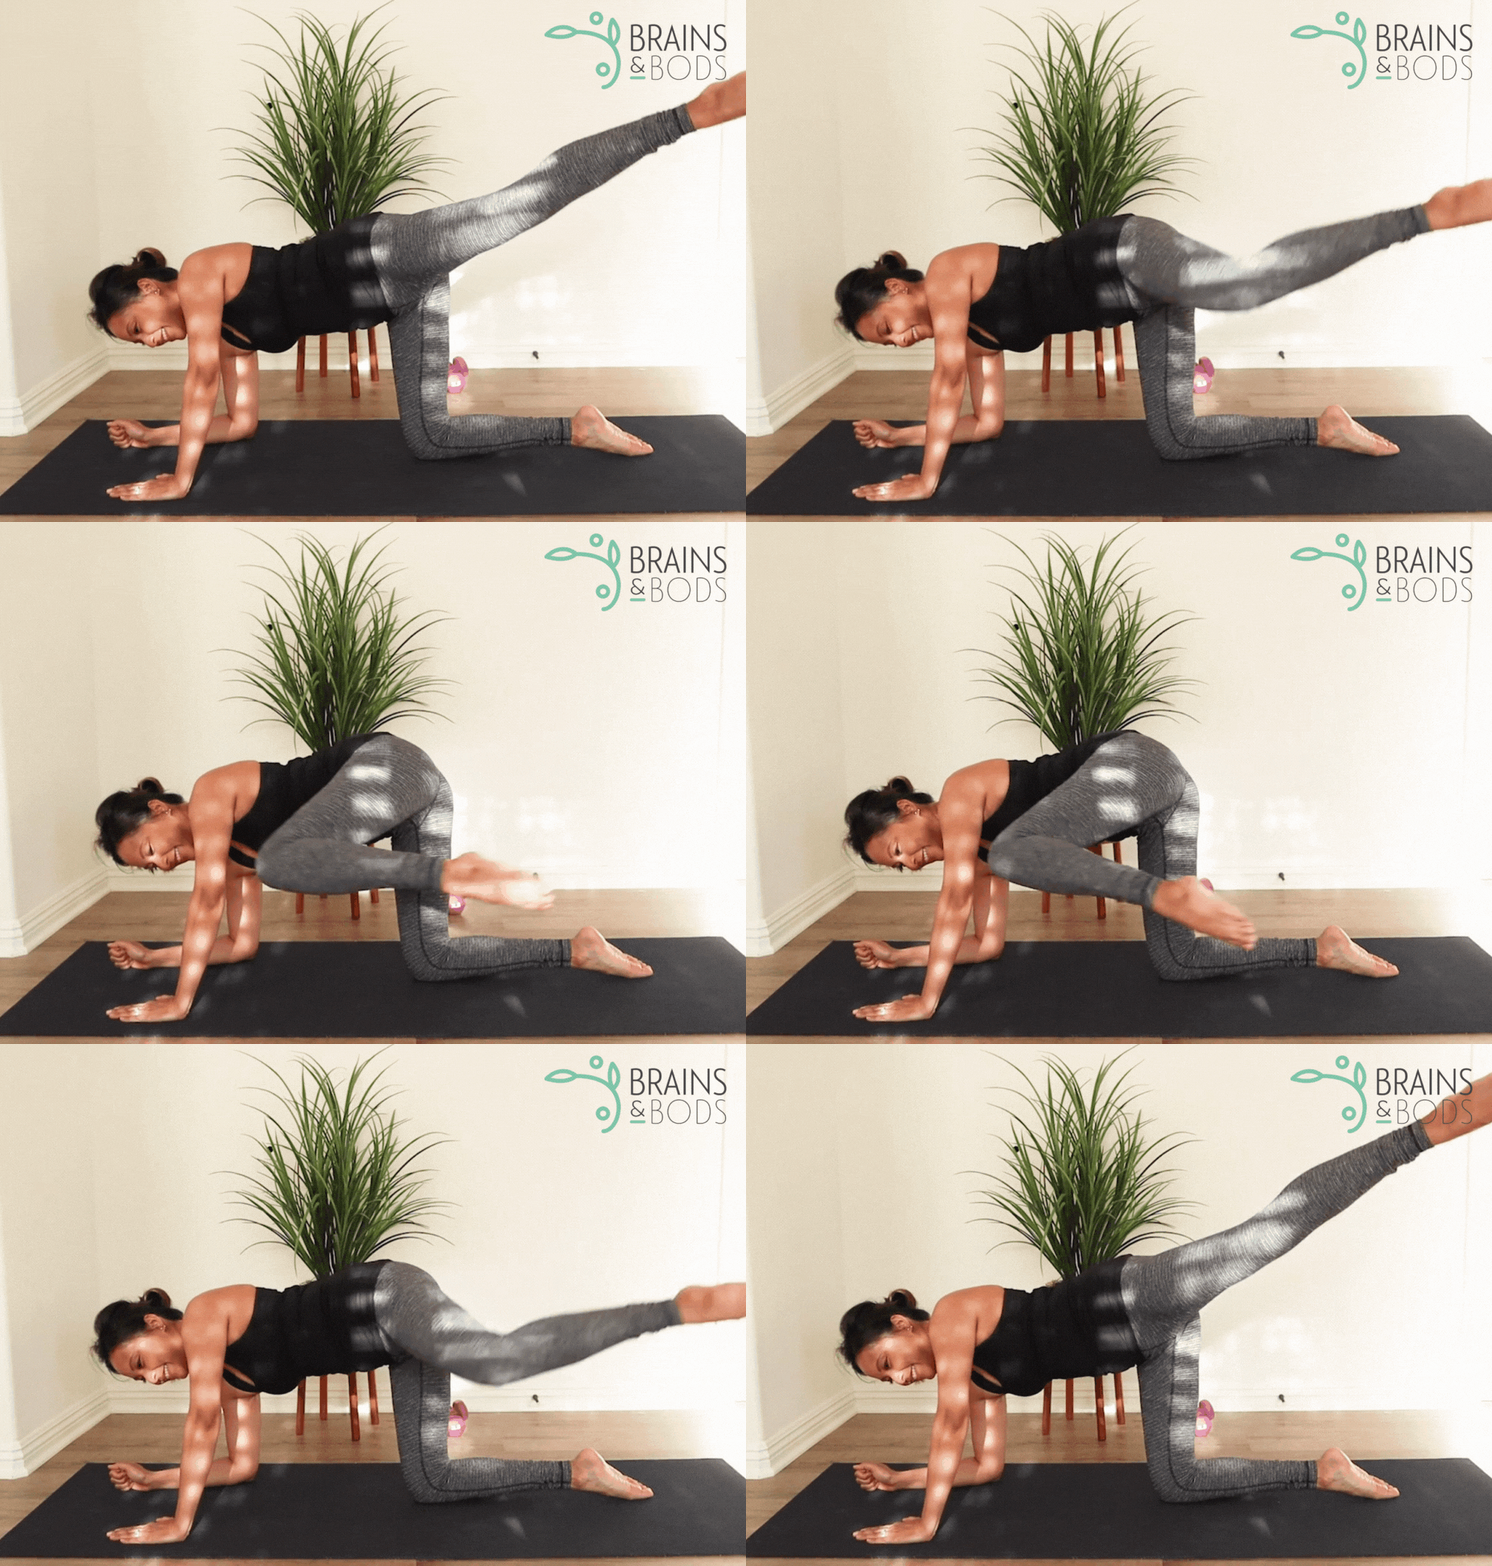
5. Quadruped Knee to Elbow Kick
Your goal is to kick your leg up toward the corner of the ceiling
Then, bend the knee to touch the elbow on the same side, and repeat kick toward the ceiling
Click Images Below to View Larger Examples of Exercises
Group 2
1. Lateral lunges
Alternate lunging from side to side, keeping the knee over the ankle and pushing your bottom back.
2. Back lunge in place
Try to maintain balance on your toes for the leg behind you. From here, lunge down towards the floor, gently tapping your knee if able and squeezing your glutes on the way up to straighten. You should remain upright throughout the movement.
3. Standing bent knee hip extension & abduction
While balancing on one leg, lift your leg out to the side while maintaining a 90 degree bend in the knee.
Similarly, you will maintain a bent knee and lift the leg behind you similar to a figure 4.
4. Side-lying hip circles
Lay on one side with the bottom leg bent for stability.
The top leg will remain straight.
Bring the leg slightly in front of the hip with toes facing down towards the floor and draw circles forward.
After a set, bring the leg slightly behind the hip and rotate your toes to face the ceiling. This time draw circles going back.
5. Side-lying clam shells
Lay on your side with both knees bent.
From here, open and close the knees, while keeping ankles close together.
Try to avoid a large opening that would cause rotation in the lower back.
Keep the movement small and controlled.
Click Images Below to View Larger Examples of Exercises
If you feel like you need a little extra burn, add 10 pulses plus a 10 sec. hold at the end of each set. I would also recommend doing all of group 1 on one side, then the other. Follow with group 2 on the same side you started with, then switch to the other. If it at any time feels like it's too much, or if you want to start slowly, alternate sides between sets for comfort.
For those who want an extra challenge, try adding some ankle weights. Start with 1 pound only. You should not be doing these exercises with weights greater than 4 lbs. Any heavier, you run the risk of irritating the tendons of the muscles surrounding the hip.
3 Glute Stretches
Don’t forget that it’s also important to stretch out your glutes and hip flexors after performing this specific sets of exercises. Here are a few stretches to cool down with. You can also do these stretches in between sets for relief from increased muscle tension.
1. Knee to chest stretch to opposite shoulder
Bring your knee to your chest, pulling the knee towards your opposite shoulder.
Hold for 20-30 sec.
Repeat as needed.
2. Figure 4 stretch
Cross one leg over the other while maintaining a figure 4.
Pull your thigh towards you and hold.
Hold for 30 sec.
Repeat as needed.
Lunge Hip Flexor Stretch
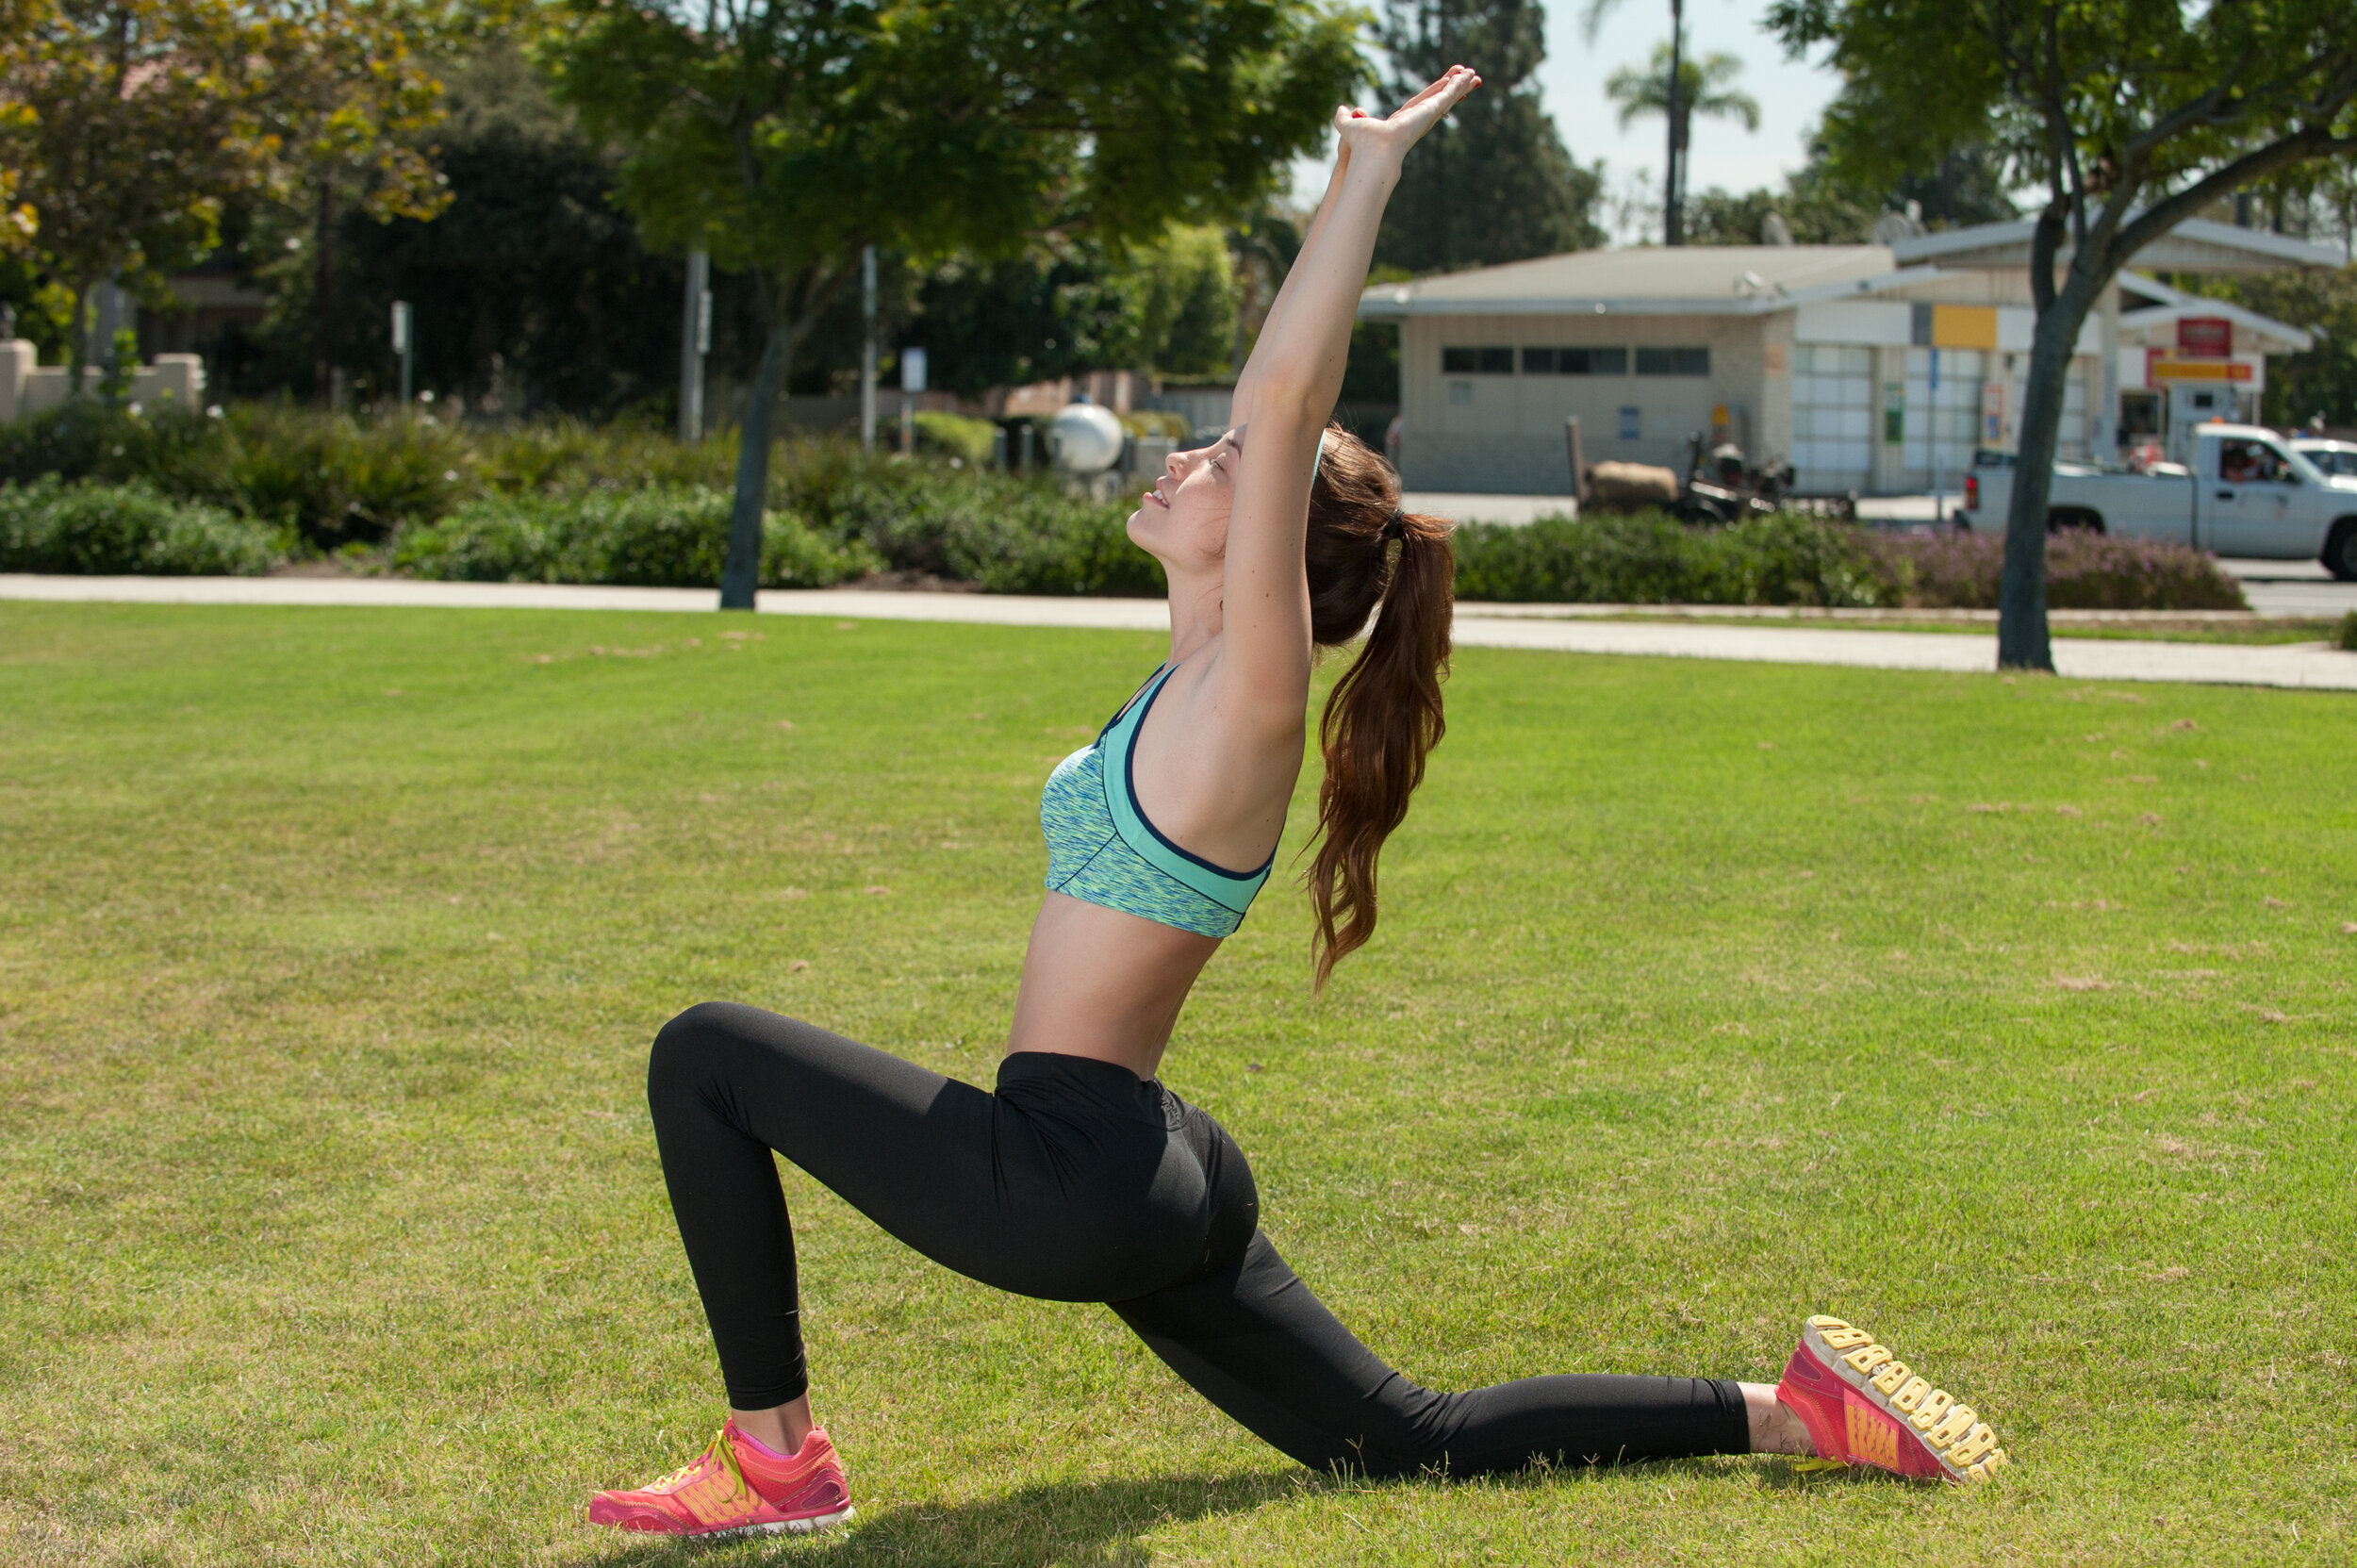
3. Lunge Hip Flexor Stretch
Get into a lunge position with your knee resting on the ground.
Make sure the knee is far enough back to feel a stretch.
Lean the body forwards. You should feel the stretch in the groin and front of the thigh on the ground.
Hold for 30 sec.
Repeat as needed.












Do you struggle with side planks? Try a modified version on your forearm and knee. You can add different exercises in this position to work the side body while working towards a full side plank.